Once again, I’m determined to get the shot. In this case, it’s the full moon rising behind downtown San Francisco. Last night was my first attempt, but given the horrible results, it won’t be my last. I was about to delete all the images from the session, but first I decided to play with them to see how much I could extract before giving up.
Like all serious shoots, it began with research.
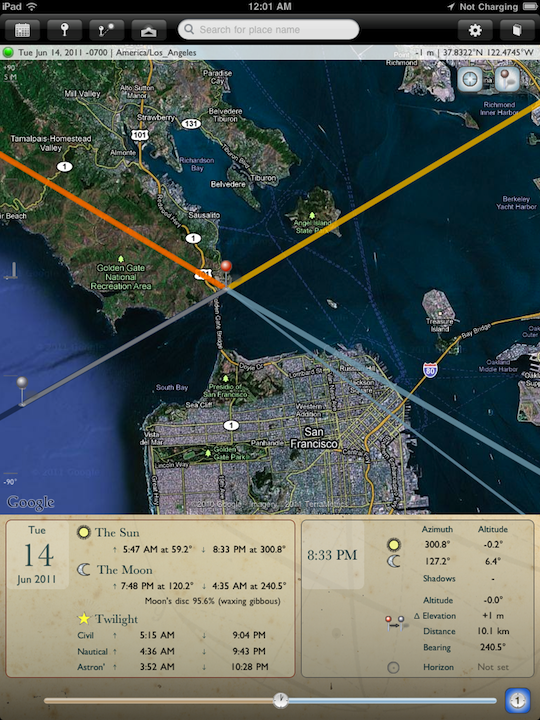
- The experts told me the best time to shoot is when the moonrise is 30 minutes before sunset. That’s often the night before full moon on the calendar. In this case (June 14, 2011) moonrise was at 7:48pm and sunset was8:33pm. Not a bad spread.
- To find the best position I used The Photographer’s Ephemeris, an awesome iOS app that shows you the exact position of the sun and moon on any date at any time.

Everything was ready, save for the one big fear: the fog, which everyone knows can come barreling in through the Golden Gate during the summer. But fog didn’t turn out to be the problem. Due to a moderate high-pressure system just offshore, there was no marine layer and no wind. And that meant haze and smog: a fairly heavy layer up to about 1,000 feet. Yuck.
But having gone this far, I schlepped all the gear (including a second body+tripod for a timelapse) to the location where I found three other photographers, all with Nikon gear. Two of them had pinpointed the location using The Photographer’s Ephemeris as well. It was so hazy, we couldn’t even see the moon until it was well above the skyline, so the photo below is one of the first of the evening. And one of the best. This was shot about 25 minutes before sunset.

As you can see, it’s horribly flat and dull. After some tweaking in Lightroom, I was able to recover some of the contrast and clarity:

Yes, I could have further lightened the unnaturally dark and saturated water and made a number of other improvements, but I just didn’t want to waste a lot of time on this one.
I posted the tweaked image on Facebook, where photo pal Scott Loftesness suggested I see how it looked as a black-and-white. I popped it into Silver Efex Pro 2, where I spent some time making a number of global and local adjustments and ended up with this:

What do you think? It’s still not at all the shot I’m looking for, but compared to the original, I think it’s at least a serviceable image. If nothing else, it shows that if you keep working at it and consider all the options (b&w in this case) you can sometimes salvage a shot that would otherwise end up in the trash.
Update: I went back and tweaked the moon. First I changed the mapping from RGB into b&w, then I adjusted the contrast. Finally, I used a layer mask in Photoshop to merge the enhanced moon into the original image. It gives the picture an entirely different look, doesn’t it?

Love the black and white! I think you might want to try “popping” the moon even more with another control point local adjustment in Silver Efex. You could also try layers in Photoshop – using Screen blend mode to pop just the moon.
LikeLike
Good work! I love Nik software. Kind of a disappointing evening with the haze but you did an excellent job of making something out of it.
LikeLike